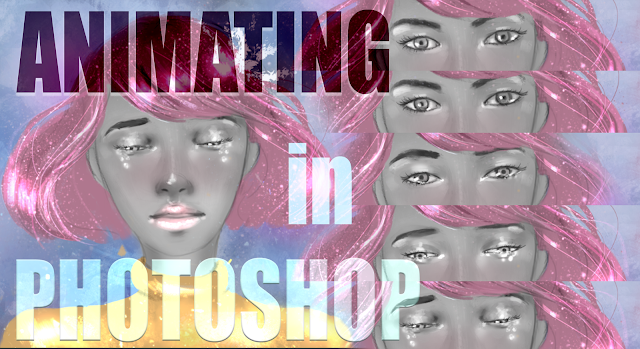
On this sort of mini guide, I will be animating a crying face which is quite a simple concept. I've been watching so many cute short story animations on Youtube that have really inspired me to do something similar in the future.
But I'll start simple on this one. Step by step until I am able to do something more substantial.
❆
❆ For this case in particular - an expression - we have to keep a few things in mind:
1 - Think of the first and last expression (neutral face - crying face)
2 - Think of the slow motion movements between the start and finish (in betweens)
3 - Be mindful of what moves (eyebrows, cheeks, muscles... ) along with the main expression. The more you tweak those details, the more believable the animation will be.
❆
❆ It really helped me to sketch just the initial and final expression and then work my in betweens from there. Also, although it can sound silly, you could photograph your face for reference by making all of those micro expressions contained in one expression. Or just film it and then make it slow motion.
This quick crying face animation I did has 5 steps that I'll be explaining below.
I - Initial expression: neutral eyes/eyebrows;
II - Watery waterline by adding a very light grey shade;
III - Eyes starting to close down with some indication of tears and the inner side of the eyebrow starts to raise;
IV - Eyes starting to close down even more with actual tears on her face and eyebrow slightly raised again;
V - Final expression: tears running down on the face.
❆
Now onto the fun part where it will all come together!
In Photoshop click Window<Timeline. A pop up window will open, so click Create Video Timeline. Here all of your layers will appear And now it's up to us to arrange them the way we want.
From left to right and from the bottom to our way up in the timeline is the order of our animation.
I think this is quite self explanatory as a way to understand how the layers should be placed. Keep in mind that the layer's duration should be the same.
To export just click on that arrow at the bottom of the left side next to those 3 squares.
And here is the final result!
This was my first try at animating so it's quite far from perfect, haha. Over time with more practice the imperfections will be more polished.
Still, I hope you enjoyed! :)


No comments:
Post a Comment